If you have ever stood on a staircase or balcony and thought, “This needs to feel solid and look clean,” you are already thinking like an engineer. The tricky part is turning a great-looking railing idea into something that actually fits your site, satisfies code, and installs without last-minute compromises. That is exactly where engineered railing shop drawings earn their keep.
This is not a buzzword or an extra piece of paperwork. For homeowners, property investors, and contractors, engineered railing shop drawings are the moment the project becomes buildable. They translate design intent into precise dimensions, attachment details, materials, and site-specific decisions that prevent the most common problems: misaligned posts, glass that does not fit, unexpected drilling into the wrong substrate, or inspection headaches.
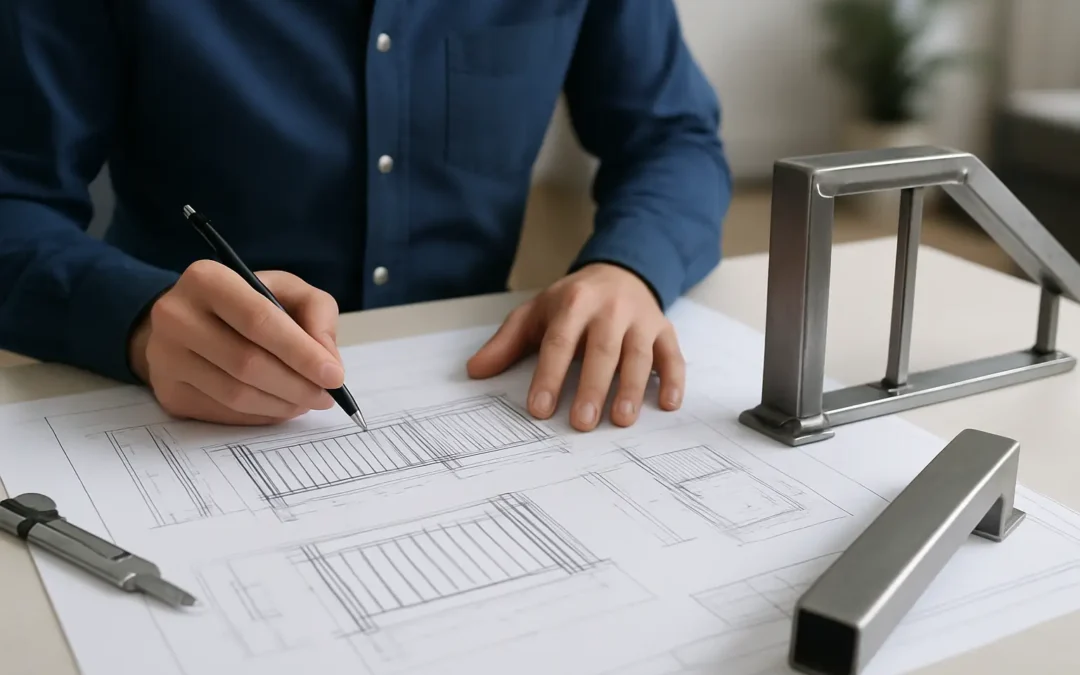
What engineered railing shop drawings actually are
Shop drawings are the fabrication and installation roadmap for your railing system. They are not marketing renderings and they are not a permit “wish list.” They are detailed drawings prepared for a specific project, showing how the railing will be built and how it will be installed.
When they are engineered, those drawings are reviewed (and often stamped) by a licensed professional engineer based on structural requirements and applicable building code. That added step matters most when a guard must resist specific loads, when you have unusual site conditions, or when the authority having jurisdiction expects an engineer’s involvement for approval.
Think of it this way: an architect’s or designer’s plans show what you want. Engineered railing shop drawings show what you are going to get, down to hole locations, glass sizes, hardware types, and anchoring method.
Why the “engineered” part matters (and when it depends)
Not every railing job needs a full engineering review. A simple interior handrail replacement on standard framing may be straightforward. But guards at stairs, landings, balconies, and elevated walking surfaces carry real life-safety requirements, and local code interpretation can vary.
Engineering becomes more than a formality when any of these factors show up:
- Glass guards where thickness, panel sizing, and attachment method must work together
- Cantilevered conditions, long runs, or minimal post designs that concentrate loads at a few points
- Unknown or mixed substrates (wood over steel, concrete with topping slabs, waterproofed balconies)
- Commercial projects with higher scrutiny, special occupancy, or more rigorous inspection processes
- Design-forward details like side-mount standoffs, base shoe systems, or concealed fasteners
There is a trade-off. Engineering adds time and cost upfront. But it can prevent expensive change orders, avoid “we will make it work onsite” installation decisions, and reduce the risk of re-fabrication. For most premium railing projects, that trade tends to favor engineering.
What should be included in engineered railing shop drawings
Good shop drawings answer questions before anyone starts cutting metal or ordering glass. They show the finished intent and the real-world constraints of your space.
Site-specific dimensions and reference points
A reliable set of field measurements is the foundation. The drawings should identify reference points that match the jobsite: floor lines, stair nosings, slab edges, walls, and landings. If the drawings cannot be checked against reality with a tape measure, they are not doing their job.
Layouts, elevations, and sections that match the build
You should see plan views (top-down), elevations (straight-on), and key sections (cut-through details) where needed. Sections matter when the railing has a base shoe, a side mount, or transitions across changing floor levels.
Material specifications and finish notes
Engineered railing shop drawings should call out what is being used, not just what it looks like. Stainless steel versus aluminum, wall thickness, glass type (tempered or laminated), and finish requirements should be clear. Finish notes matter because they affect lead times and how parts are fabricated.
Connection and anchoring details
This is where many projects succeed or fail. The drawings should specify fastener type, embedment depth, edge distances, and the substrate assumption (concrete, steel, wood framing). If the substrate is uncertain, the drawings should show options or note what must be verified onsite.
Code-related geometry: height, openings, and graspability
Railing and guard code is not just about strength. Height requirements, maximum openings, and handrail graspability all show up in how the system is drawn. A sleek design that ignores a clearance or opening rule can turn into a redesign at the worst time.
Glass panel sizes and hardware coordination
For glass railings, small drafting choices have big consequences. Panel sizes must coordinate with post spacing, corner conditions, gate openings (if any), and hardware tolerances. Your drawings should clearly identify each panel, its thickness, and how it is retained.
The workflow: how drawings protect the schedule
When the process is structured, engineered railing shop drawings do not slow a project down – they keep it from stalling later.
1. Field measurement and site verification
A site visit is where reality is captured: out-of-square walls, sloped slabs, stair variations, and hidden constraints. This step is also when an experienced fabricator flags risks, like waterproofing systems that cannot be penetrated or substrates that may not accept standard anchors.
2. Drafting and internal review
Drafting converts measurements into a buildable set. A good internal review checks more than aesthetics. It asks: Can we fabricate this cleanly? Can we install it without damaging finishes? Do we have tolerances for the inevitable site variation?
3. Client approval before engineering submission
Your approval matters because shop drawings lock decisions in. This is the point to confirm post locations, top rail profiles, glass tint, and transitions. If you want a minimalist look with fewer posts, it is better to have that conversation before engineering and ordering.
4. Engineering review and stamp (when required)
Engineering review evaluates loads and connections and confirms the system performs as intended. The output may be a stamp, a letter, or revised details – it depends on jurisdiction and project type.
5. Fabrication and coordinated installation
Once drawings are approved, fabrication can proceed with confidence. Installation becomes predictable because the crew is not inventing details on the fly.
Common issues drawings prevent (the expensive ones)
Most railing problems are not “bad craftsmanship” problems. They are coordination problems.
One common issue is anchor conflict. If the installer arrives and discovers post locations land directly over a hollow core area, a drainage channel, radiant heating, or a waterproofing detail, the project becomes a scramble. A thoughtful drawing set forces early substrate conversations.
Another issue is stair geometry drift. Stairs often vary slightly step to step. If measurements are assumed or averaged, handrail brackets and returns can miss, and the handrail can look wavy. Accurate field measurement and clear reference points prevent that.
Glass sizing is another frequent cost driver. Glass is not forgiving. If a panel is ordered too wide or too tall, it is not a “trim it onsite” situation. Shop drawings that label panels and show clearances reduce re-orders.
How to read your shop drawings without being a technical expert
You do not need to be an engineer to approve shop drawings, but you should know what to look for.
Start with the overall layout. Confirm the railing is where you expect it to be, and that openings (like stair entries or balcony corners) match your mental picture. Then look at heights. If a guard looks “short” in elevation, ask the question now.
Next, zoom in on mounting. If you are expecting a clean fascia mount, confirm the brackets are shown that way. If you are trying to avoid floor penetrations because of waterproofing, verify the attachment method reflects that.
Finally, check the finishes and the “scope edges.” If your project includes a gate, a stair return, or a special transition, make sure it is drawn and labeled. If it is not on the drawings, it has a way of not showing up on install day.
Choosing a partner: what to ask before you sign
Because engineered railing shop drawings affect schedule and risk, it is fair to ask direct questions upfront.
Ask who measures, who drafts, and who coordinates engineering review. Ask how revisions are handled if field conditions differ. And ask what you will receive at the end: stamped drawings, installation details, and any documentation needed for inspection.
At Iron & Glass Designs, our workflow is built around this exact handoff – site measurement, job-specific drawings, client approval, engineer review when required, then fabrication and on-time installation. That structure is not just process for process’s sake. It is how premium railings stay premium all the way through the last screw.
The bottom line: drawings are where confidence comes from
A railing is one of the few architectural features people touch every day. It has to feel solid, look intentional, and meet code without looking like it was designed by committee.
Engineered railing shop drawings are the quiet step that makes that possible. They are where design becomes certainty, where the install becomes predictable, and where you can make decisions with your eyes open instead of reacting under deadline pressure.
If you are planning a railing project, ask to see the drawings before anything is fabricated. The best time to improve a railing is while it is still lines on paper, not after it is welded, drilled, and delivered.