A railing can look perfectly clean in a showroom and still fail on your staircase if the measurements are off by even a small margin. On stairs, precision matters twice – once for safety, and again for how the finished railing lines up with the space. If you are planning a custom glass, metal, or mixed-material system, the measuring stage is where a good-looking result starts.
If you are wondering how to measure stairs for railings, the short answer is this: you need more than the total stair length. A usable measurement package includes the total rise, total run, number of treads and risers, stair angle, tread depth, landing dimensions, and the exact locations of walls, posts, and any obstructions. That is what allows a railing fabricator to turn an idea into something buildable, code-aware, and visually balanced.
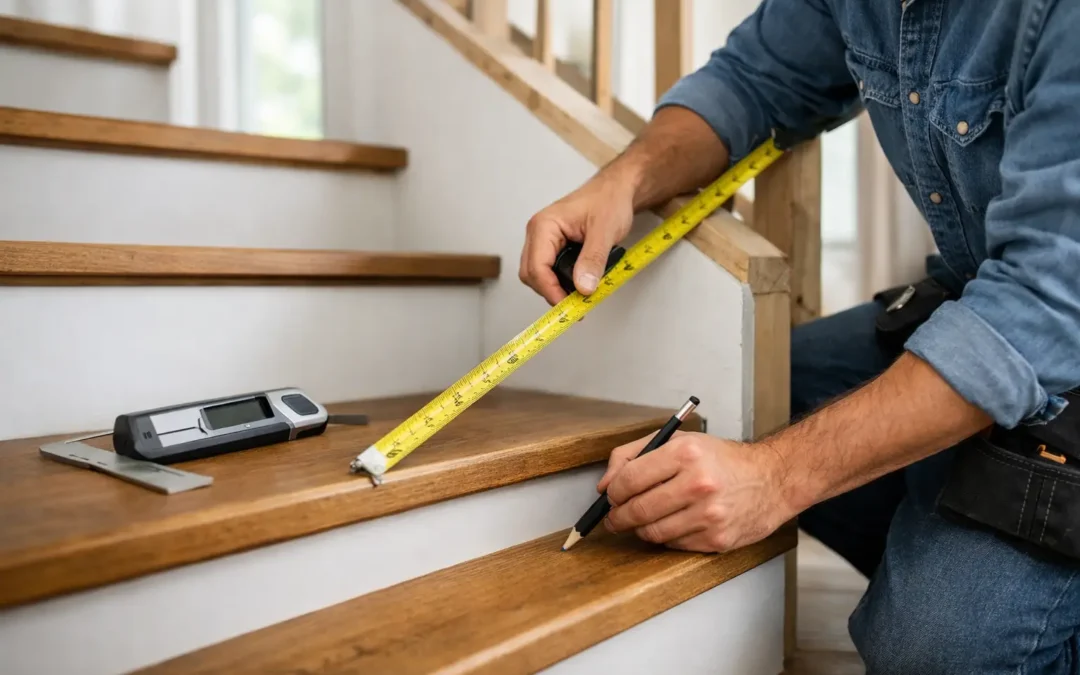
What you need before you measure
Start with a sturdy tape measure, a level, a framing square if you have one, a notepad, and your phone for photos. A laser measure can help on longer runs, but a standard tape is still the most dependable tool for checking stair details closely.
It also helps to know what kind of railing you want. Measuring for a frameless glass system is not quite the same as measuring for a wrought iron picket railing or a wall-mounted handrail. The staircase itself is the same, but the attachment points, clearances, and finish details can change what matters most.
For that reason, early measurements are useful for budgeting and design direction, but final fabrication measurements should be exact. In custom work, there is no substitute for a site-specific measure.
How to measure stairs for railings step by step
The cleanest way to approach this is to work from the overall staircase down to the smaller details.
Measure the total rise
The total rise is the vertical height from the finished floor at the bottom of the stairs to the finished floor at the top landing. Measure straight up, not along the slope of the stairs.
This number matters because railing height, post placement, and stair pitch all relate back to it. If flooring is not installed yet, that changes the finished height and should be accounted for. A staircase measured before tile, hardwood, or stair coverings go in can end up producing the wrong result if no allowance is made.
Measure the total run
The total run is the horizontal distance from the front edge of the first tread to the edge of the upper landing. This is not the same as measuring along the nose of each step with the tape following the angle. You want the flat, horizontal travel of the stair.
If your staircase turns or includes a landing between runs, measure each section separately. Straight flights are simpler. Multi-level or switchback stairs require a more detailed layout.
Count treads and risers
Count every tread and every riser carefully. A missing step in your notes creates problems fast, especially when custom panels or picket spacing are being laid out.
Write down whether the top landing acts as the last tread or sits beyond the stair run. That distinction can affect where the railing terminates and how the top transition is built.
Measure tread depth and riser height
Pick several steps and measure from nosing to nosing for tread depth, then from the top of one tread to the top of the next for riser height. Do not assume every stair is perfectly consistent, especially in older homes or exterior stair systems.
If there is variation, note the largest and smallest measurements. That tells you whether the stair was built evenly or if there are field conditions that may require adjustment during fabrication or installation.
Measure the stair angle
The stair angle can be calculated from rise and run, or checked with an angle finder. This is especially helpful for sloped handrails and any custom infill such as glass panels or horizontal bar systems.
Even when a fabricator can calculate the pitch, an on-site confirmation is still smart. Small framing differences show up quickly on a clean modern railing.
Don’t forget landings, walls, and edge conditions
A staircase is not just steps. The surrounding architecture matters just as much.
Measure top and bottom landings
Take the width and depth of each landing. Note where the stair meets open space, a wall, a half wall, or another railing section. If the railing needs to turn, die into a wall, or align with a balcony guard, that has to be measured from the start.
The landing is often where design decisions become visible. A straight stair rail may be simple, but the top return, corner connection, or transition to a horizontal guard is where custom craftsmanship shows.
Measure the stair width
Measure the clear width of the staircase from wall to wall, or from wall to open edge. Do this in more than one location. Walls are not always perfectly straight, and finished surfaces can vary.
This is particularly important if you are planning a railing mounted inside the stair width rather than on the outer stringer or floor edge. With glass, stainless steel, or thicker post systems, an inch here or there affects both appearance and usable walking space.
Note obstructions and attachment points
Look for trim, baseboards, door swings, floor vents, window ledges, and low overhangs. Also note what the railing will mount into – wood framing, concrete, steel, tile, or stone.
This matters because a railing is not just measured to fit the stairs. It has to be engineered to attach properly and perform safely over time. A beautiful custom railing still depends on solid substrate and correct anchoring.
How to measure for different railing styles
Not every railing system uses the same critical dimensions.
For a wall-mounted handrail, the main concerns are stair pitch, handrail height, the start and end points, and enough wall clearance for a comfortable grip. For a post-and-picket railing, layout spacing and post locations become a bigger part of the measuring process.
For glass railings, the measurement standard is tighter. Glass does not forgive uneven stair geometry the way some metal systems can. Panel widths, mounting hardware locations, stair angle, and finished floor transitions all need to be captured accurately. On stairs with modern open design, these details are what create that crisp, intentional look clients want.
Wrought iron and aluminum systems offer more flexibility in some situations, but they still rely on accurate rise, run, and landing measurements to keep lines straight and heights consistent.
Common measuring mistakes that cause delays
The most common issue is measuring from unfinished surfaces without noting what will be added later. New flooring, stair caps, tile build-up, and finished wall treatments can all shift final dimensions.
Another mistake is assuming both sides of a staircase are identical. In reality, one wall may bow, one stringer may sit slightly proud, or one landing may be out of square. That is why field verification matters.
People also tend to record only the overall stair length and height, then stop there. That may be enough for a rough quote, but not enough for fabrication. A professional railing package needs the full picture.
When a professional measure makes more sense
If your project involves custom glass, curved sections, multiple landings, exterior stairs, or permit-related work, professional measurement is the safer path. The more tailored the design, the less room there is for guesswork.
That is also where process matters. At Iron & Glass Designs, measurement is part of a controlled workflow that supports design drawings, client approval, engineering review when required, and clean installation. For homeowners and property investors, that structure removes the uncertainty that often comes with custom fabrication.
A free site visit can save time, prevent redesigns, and make sure the finished railing feels like it belongs to the architecture instead of being fitted to it after the fact.
What to send when requesting a quote
If you are gathering pricing before a site visit, send a few basics: overall stair photos, side-view photos if possible, the total rise and run, stair width, number of treads, and dimensions of any landings. Mention the railing style you are considering and whether the project is interior or exterior.
If there are special conditions such as concrete stairs, tile finishes, or a need to match an existing balcony or guard, include that too. The more complete the information, the more accurate the early guidance will be.
Good railings do not start in the shop. They start with measured intent – the kind that respects safety, design, and how the finished space is meant to feel. If you want your staircase to look refined and perform the way it should, measure carefully, verify the details, and let the final system be built around the real conditions of the space.